

Consider a common scenario: someone with years of on-and-off low back pain, an ache that flares after long days at a desk or the first few miles of a run. Lumbar support cushions, core workouts, even a back brace haven’t helped. On assessment, the pattern is often clear — tight, shortened hip flexors are tugging the pelvis forward, while the muscles that should be pulling the other way, the hamstrings and glutes, have gone weak and underused. The low back muscles end up working overtime just to keep the body upright. They’re not broken. They’re exhausted.
This is the pattern behind the vast majority of low back pain that doesn’t trace to a specific injury: a muscle imbalance, quietly built up over years of sitting, driving, and standing without ever noticing.
The Pelvis Caught In The Middle
Low back doesn’t work in isolation. It’s anchored to the pelvis, and the pelvis is pulled on from every direction — by the hip flexors in front, and the hamstrings and glutes behind. When one side of that tug-of-war wins, the pelvis tilts, and the spine has to compensate.
The most common version of this, especially for anyone who sits for a living, is called an anterior pelvic tilt. Hours in a chair shorten the hip flexors, which pull the front of the pelvis down and forward. The lower back arches to compensate, and the muscles along the spine tighten to hold that new, exaggerated curve. The abdominals, stretched into that arch, weaken along with everything else, but the muscles doing the most important counterbalancing work, the ones anchoring the pelvis from behind, are the glutes and hamstrings. When those go quiet, the whole pattern locks in place.
The result is a low back that feels tight, sore, and “out,” when the actual imbalance is happening at the hips. Stretching the low back — and many people do, for years — targets the muscle that’s already overworked, while the true source, tight hip flexors paired with a weak backside, goes untouched.
Correcting The Pattern: A Muscle-Balance Approach
From a muscle-balance perspective, the goal isn’t to strengthen everything at once or to stretch whatever feels tight; it’s to follow a specific sequence. Short, overactive muscles need to be released and lengthened first; only then can the long, underactive muscles they’ve been overpowering be effectively strengthened. Trying to strengthen a weak muscle while the muscle opposing it is still short and tight is like trying to open a door that’s still latched: the effort goes in, but the door doesn’t move. For an anterior pelvic tilt, that means the hip flexors come first, and the glutes and hamstrings come second.
Step 1: Release The Hip Flexors With A Kneeling Hip Flexor Stretch
Three muscles do most of the pulling here: the psoas, which runs from the lower spine to the top of the thigh bone; the rectus femoris, one of the quadriceps, which crosses both the hip and the knee; and the tensor fasciae latae (TFL), a smaller hip flexor at the front of the pelvis. Because they attach directly onto the pelvis, chronic shortness in any of these muscles pulls the pelvis forward and down.
A kneeling hip flexor stretch addresses all three. Kneel on one knee with the other foot planted in front, both knees bent to roughly 90 degrees. Keeping the torso upright — not leaning forward — gently shift the hips forward until a stretch is felt along the front of the hip and thigh of the kneeling leg. Tucking the pelvis slightly under (like flattening the low back) deepens the stretch into the psoas specifically. Hold for 30 to 60 seconds, breathing normally, then switch sides. The stretch should feel like a steady pull, never sharp or painful. Forcing it tends to trigger a protective tightening, which works against the goal.
This is worth doing daily, ideally both morning and evening, and especially after long periods of sitting, when these muscles have had hours to shorten. Consistency matters more than intensity; a gentle stretch repeated daily does more than an aggressive one done occasionally.
Step 2: Reawaken The Glutes And Hamstrings With A Glute Bridge
Once the hip flexors have started to release, the hamstrings and gluteus maximus need to be cued back into action. In this pattern they aren’t usually weak in the sense of lacking strength potential; they’ve simply gone quiet, recruited less and less as the hip flexors took over the job of stabilizing the pelvis. The first goal is re-education — teaching these muscles to fire on command again, before loading them heavily.
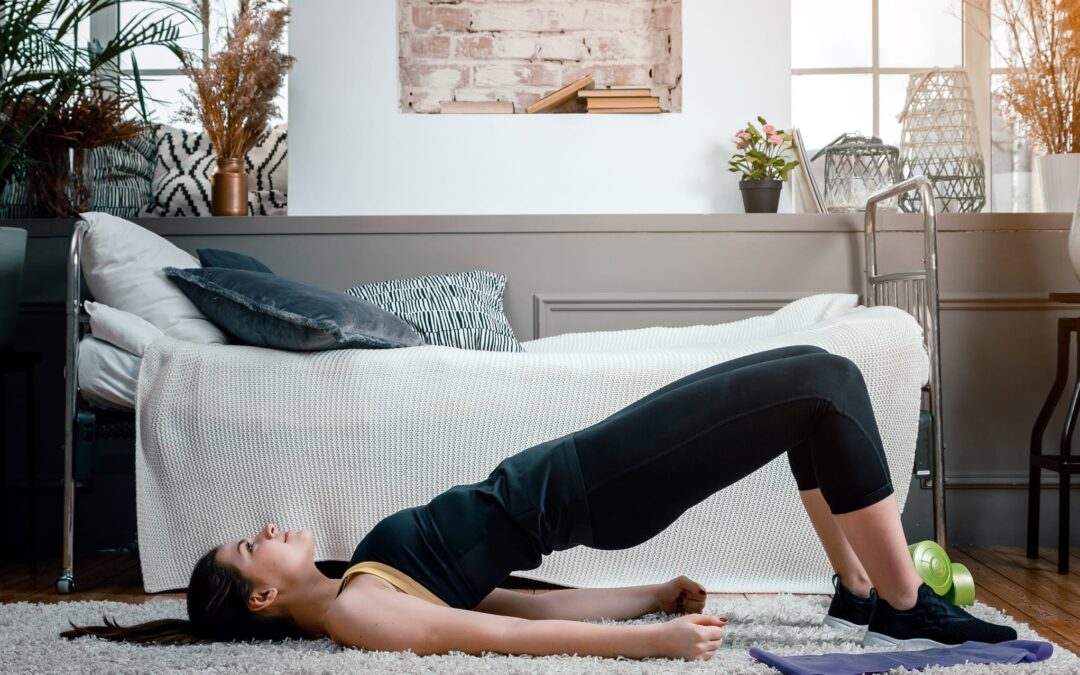
A basic glute bridge is the starting point. Lying on the back with knees bent and feet flat on the floor, hip-width apart, press through the heels and lift the hips until the body forms a straight line from knees to shoulders — squeezing the glutes firmly at the top rather than arching through the low back to get there. Hold for two to three seconds, then lower with control. Ten to fifteen repetitions, for two to three sets, is a reasonable starting point.
A useful cue: press the heels down and imagine dragging them toward the glutes, which shifts emphasis away from the hamstrings alone and toward the glutes doing their share of the work. If the low back or hamstrings cramp before the glutes seem to engage, that’s often a sign the hip flexors are still limiting the movement — a good indicator to spend a bit more time on Step 1 before progressing.
As bridges become comfortable, single-leg bridges, standing hip extensions (pressing one leg straight back while holding a wall or chair for balance), and light hamstring curls can build on the same pattern — always keeping the emphasis on control and glute activation rather than speed or heavy load.
Step 3: Interrupt The Pattern During The Day
Exercise alone rarely outpaces hours of sitting. Standing and walking for a few minutes every 30 to 45 minutes prevents the hip flexors from settling back into a shortened position. When sitting is unavoidable, a small reminder — bringing the pelvis to neutral rather than letting it tip forward into an exaggerated arch — keeps the low back from having to compensate for hours at a stretch. Over time, this awareness becomes automatic, but it usually takes deliberate practice at first.
One caution from the muscle-balance perspective: resist the instinct to stretch the low back itself. It feels tight because it’s overworked, not because it’s short. Stretching it repeatedly can further irritate muscles that are already straining to compensate. The low back generally responds better to rest and support while the hip flexors, glutes, and hamstrings do the corrective work.
A realistic starting routine looks like this: hip flexor stretch, both sides, morning and evening; glute bridges, ten to fifteen reps, two to three sets, once daily; and a movement break every 30 to 45 minutes during long periods of sitting. None of this requires special equipment beyond a mat and a wall or low step.
It won’t undo years of imbalance overnight, but it moves in the right direction — addressing the actual source of the pattern instead of chasing the ache where it happens to show up.
Lee Albert, NMT, is a neuromuscular therapist and the creator of Integrated Positional Therapy (IPT), a root-cause approach to chronic musculoskeletal pain. He is the author of Live Pain Free and Yoga for Pain Relief (winner of the 2018 IBPA Benjamin Franklin Gold Award), and has been featured in two national PBS specials. Visit leealbert.com.
Find holistic Bodywork Practitioners in the Spirit of Change online Alternative Health Directory.
RELATED ARTICLES:
Understanding That Chronic Back Pain Originates From Within The Brain Could Lead To Quicker Recovery, A New Study Finds
5 Gentle Yoga Poses For Relieving Back Pain
Recent Comments